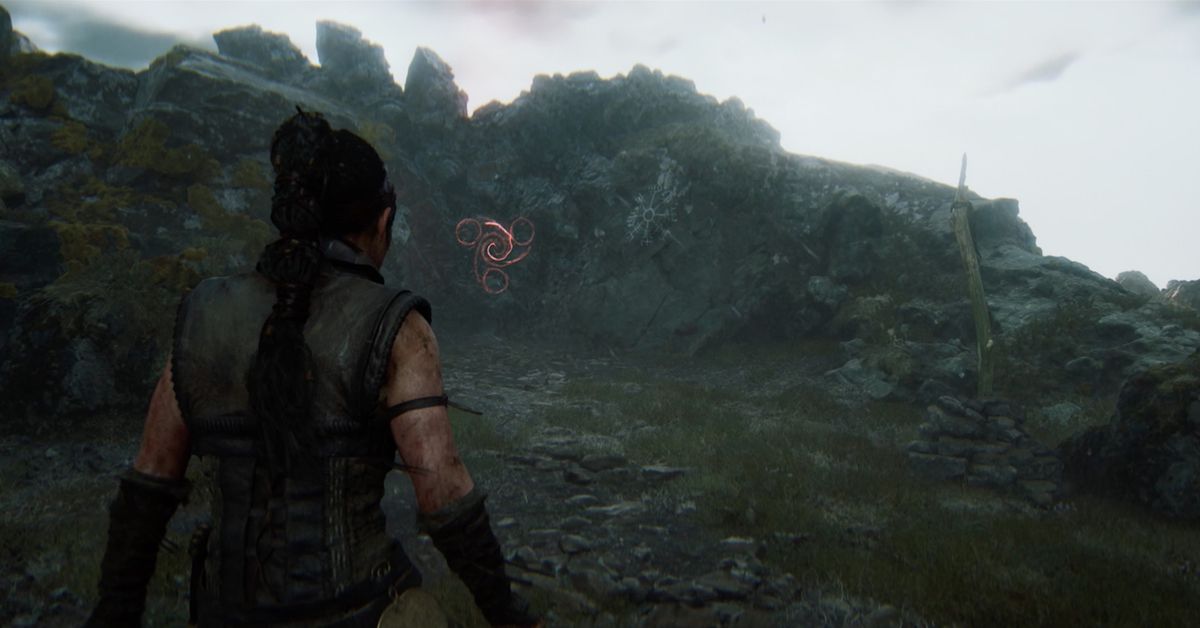
Finding the sea giant’s name in Hellblade 2 requires you to solve another perspective-based rune puzzle. You’ll reach this part of Senua’s journey during chapter 5, “Bardarvik” (“Bárðarvík”) after you find the hiddenfolk. On your way to Bardarvik, you’ll have to fight some draugar, and then you’ll have to complete two rune puzzles before you can find Sjavarrisi the sea giant’s true name.
To solve both of the puzzles, you’ll have to play with perspective to line up shapes in the landscape to recreate runes — just like you did back in Freyslaug.
Our Hellblade 2 guide will show you how and where to find the runes in both of the Bardarvik puzzles.
Where to find the first Bardarvik puzzle runes in Hellblade 2
:no_upscale()/cdn.vox-cdn.com/uploads/chorus_asset/file/25460030/Hellblade_2_bardarvik_puzzle_2.jpg)
Image: Ninja Theory/Xbox Game Studios via Polygon
After your run-in with the draugar, Astridr will run ahead to the village and you’ll be left to solve a three-part rune puzzle. To get started, you’ll walk past a mostly collapsed house, a wooden watchtower, and then drop off a small ledge — we’ll use those as landmarks.
First rune location
:no_upscale()/cdn.vox-cdn.com/uploads/chorus_asset/file/25460031/Hellblade_2_bardarvik_puzzle_3.jpg)
Image: Ninja Theory/Xbox Game Studios via Polygon
Before anything else, turn away from the gate. There’s a sort of ramp made out of the iridescent rocks leading up to a small platform.
:no_upscale()/cdn.vox-cdn.com/uploads/chorus_asset/file/25460033/Hellblade_2_bardarvik_puzzle_4.jpg)
Image: Ninja Theory/Xbox Game Studios via Polygon
At the top of the ramp, look to your left to find the first rune.
Second rune location
:no_upscale()/cdn.vox-cdn.com/uploads/chorus_asset/file/25460034/Hellblade_2_bardarvik_puzzle_5.jpg)
Image: Ninja Theory/Xbox Game Studios via Polygon
There’s a water droplet off to the left of the rune gate. Go focus on it to flip around some rocks, and then come back to the platform you were just on. Head to the left of the ramp (that doesn’t exist anymore), and you’ll find a path that leads back to the houses you passed earlier.
:no_upscale()/cdn.vox-cdn.com/uploads/chorus_asset/file/25460035/Hellblade_2_bardarvik_puzzle_6.jpg)
Image: Ninja Theory/Xbox Game Studios via Polygon
When you get to the first house, focus on the water drop there to move more rocks. This opens a path to the right. Follow it to another house.
:no_upscale()/cdn.vox-cdn.com/uploads/chorus_asset/file/25460037/Hellblade_2_bardarvik_puzzle_7.jpg)
Image: Ninja Theory/Xbox Game Studios via Polygon
When you reach this house, turn to the left. You’ll find the second rune in line with the roof’s edge.
Third rune location
:no_upscale()/cdn.vox-cdn.com/uploads/chorus_asset/file/25460038/Hellblade_2_bardarvik_puzzle_8.jpg)
Image: Ninja Theory/Xbox Game Studios via Polygon
Head back the way you came and use the water drop you just focused on to switch the rocks back. As you head back toward the rune gate, keep to the right.
:no_upscale()/cdn.vox-cdn.com/uploads/chorus_asset/file/25460041/Hellblade_2_bardarvik_puzzle_9.jpg)
Image: Ninja Theory/Xbox Game Studios via Polygon
Keep looking off to your right to spot the third rune in the lichen.
Where to find the second Bardarvik puzzle runes in Hellblade 2
:no_upscale()/cdn.vox-cdn.com/uploads/chorus_asset/file/25460049/Hellblade_2_bardarvik_shipwreck_puzzle_1.jpg)
Image: Ninja Theory/Xbox Game Studios via Polygon
When you pass through the gate, you’ll follow the cliff’s edge for a while. Watch on your right for a hidden stone face. Keep following the path until you have a quick conversation with Astridr. You’ll part ways again, and Senua’s path will take her down to a shipwreck-lined beach.
:no_upscale()/cdn.vox-cdn.com/uploads/chorus_asset/file/25460050/Hellblade_2_bardarvik_shipwreck_puzzle_2.jpg)
Image: Ninja Theory/Xbox Game Studios via Polygon
That’s where you’ll find the next puzzle when you approach the cave along the beach. The runes you’re looking for are all formed by the seaweed-covered mast parts. However, this is the most spread out puzzle by far, so you’ll have to put in a bit of work to spot them.
First rune location
:no_upscale()/cdn.vox-cdn.com/uploads/chorus_asset/file/25460051/Hellblade_2_bardarvik_shipwreck_puzzle_3.jpg)
Image: Ninja Theory/Xbox Game Studios via Polygon
From the rune gate, turn right and head down to the water’s edge. There’s a water drop there to focus on.
:no_upscale()/cdn.vox-cdn.com/uploads/chorus_asset/file/25460052/Hellblade_2_bardarvik_shipwreck_puzzle_4.jpg)
Image: Ninja Theory/Xbox Game Studios via Polygon
Do that, and then run back toward the gate. On your right, there’s a new path behind the shipwreck.
:no_upscale()/cdn.vox-cdn.com/uploads/chorus_asset/file/25460053/Hellblade_2_bardarvik_shipwreck_puzzle_5.jpg)
Image: Ninja Theory/Xbox Game Studios via Polygon
Once you’re behind the ship, keep to the right and focus on the water drop again. That will restore a ledge you need to climb. Climb both ledges and then follow the trail to the end. Focus on the water drop you find there.
:no_upscale()/cdn.vox-cdn.com/uploads/chorus_asset/file/25460055/Hellblade_2_bardarvik_shipwreck_puzzle_7.jpg)
Image: Ninja Theory/Xbox Game Studios via Polygon
Backtrack a little, and there will be a new path on your left. Follow it to the end and all the way to the right. You’ll find the first rune when you look to the left — it’s the backward F-shaped one.
Second rune location
:no_upscale()/cdn.vox-cdn.com/uploads/chorus_asset/file/25460056/Hellblade_2_bardarvik_shipwreck_puzzle_8.jpg)
Image: Ninja Theory/Xbox Game Studios via Polygon
Back down on the beach, go past the rune gate and use the water drop down by the shore to switch the rocks again. Climb back up onto the ledge that brought you down to the shore, and take a left to head toward the water.
:no_upscale()/cdn.vox-cdn.com/uploads/chorus_asset/file/25460057/Hellblade_2_bardarvik_shipwreck_puzzle_9.jpg)
Image: Ninja Theory/Xbox Game Studios via Polygon
When you run out of path, look to the left and focus on the water drop again.
:no_upscale()/cdn.vox-cdn.com/uploads/chorus_asset/file/25460058/Hellblade_2_bardarvik_shipwreck_puzzle_10.jpg)
Image: Ninja Theory/Xbox Game Studios via Polygon
A little way down the path, look to your left. You’ll need to line up the rock, a mast, and the bow of a shipwreck to find the second rune — the psi-shaped one (ψ or, more thematically appropriate, a curved ).
Third rune location
:no_upscale()/cdn.vox-cdn.com/uploads/chorus_asset/file/25460059/Hellblade_2_bardarvik_shipwreck_puzzle_11.jpg)
Image: Ninja Theory/Xbox Game Studios via Polygon
From the second rune, continue to the left and drop down to the beach again. Head to the right to find a ledge to climb. When you hit a block, turn to your left and focus on the water drop near the shoreline to open the path.
:no_upscale()/cdn.vox-cdn.com/uploads/chorus_asset/file/25460060/Hellblade_2_bardarvik_shipwreck_puzzle_12.jpg)
Image: Ninja Theory/Xbox Game Studios via Polygon
Continue around until you run out of path again. This time, the water drop you need is off to the right. When you hit a dead end, use the water drop to your left.
:no_upscale()/cdn.vox-cdn.com/uploads/chorus_asset/file/25460061/Hellblade_2_bardarvik_shipwreck_puzzle_14.jpg)
Image: Ninja Theory/Xbox Game Studios via Polygon
Keep following the path until you reach a shack on the cliff’s edge. Head inside and look through the window(?) on your left to find the final, F-shaped rune.

